 USA Owned & Operated


Step-by-Step Guide to Upgrade from Windows 10 to Windows 11

Step 1: Check System Requirements
Before proceeding with the upgrade, ensure your PC meets the minimum system requirements for Windows 11:
- Processor: 1 gigahertz (GHz) or faster with at least two cores on a compatible 64-bit processor or System on a Chip (SoC)
- RAM: 4 GB or more
- Storage: 64 GB or larger storage device
- System firmware: UEFI, Secure Boot capable
- TPM: Trusted Platform Module (TPM) version 2.0
- Graphics card: DirectX 12 compatible graphics / WDDM 2.x
- Display: >9” with HD Resolution (720p)
- Internet connection: Windows 11 Home edition requires internet connectivity and a Microsoft account to complete device setup on first use.

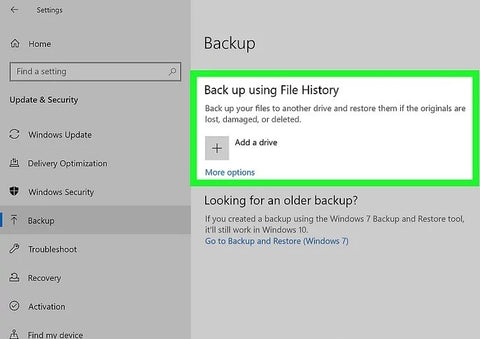
Step 2: Backup Your Data
Before upgrading, back up important files to avoid any data loss. Use external drives, cloud storage, or any preferred backup method.
Step 3: Update Windows 10
Ensure your Windows 10 is up to date to receive the Windows 11 upgrade offer.
- Go to Settings > Update & Security > Windows Update.
- Click Check for updates and install any available updates.

Step 4: Download and Install Windows 11
If your PC is eligible, you should see an option to download and install Windows 11 in the Windows Update section.
- Go to Settings > Update & Security > Windows Update.
- Click on Check for updates.
- If available, you will see Feature update to Windows 11. Click Download and install.

Step 5: Follow the Installation Process
Once the download is complete, follow the on-screen instructions to install Windows 11. This process may take some time and your PC will restart several times.
- After clicking Download and install, the installation will prepare and start automatically.
- Your PC will restart a few times during this process. Ensure it remains powered on.

Step 6: Configure Windows 11 Settings
After installation, configure your initial settings such as privacy settings, network, and account setup.
- Follow the on-screen prompts to choose privacy settings.
- Log in with your Microsoft account (required for Windows 11 Home).

Step 7: Verify Installation and Enjoy Windows 11
Once setup is complete, verify that Windows 11 is installed correctly:
- Go to Settings > System > About and check the Windows specifications to ensure it lists Windows 11.

Conclusion
Upgrading to Windows 11 can bring a fresh look and enhanced features to your PC. Follow these steps carefully to ensure a smooth transition. For those requiring a genuine license or any additional Microsoft products to enhance their new system, visit YourOfficeHub.com to ensure you’re getting the best and most secure software experience.